In Sage 300 ERP (formerly known as Sage Accpac ERP) has a distinctive feature known as Source Journal Profile in GL, which can be used by User to configure their Source Journals Reports. Say for an example, Users want to view Total Cash In or Payment that he has received, then in Source Journal Profile he has to define the source journal profile code say Payment, AR Payments for a particular account (Petty Cash), which would list down all the transactions (payments) for Petty Cash account.
The GL Source Journal Profiles let you specify which source (type) of transactions you want in a report. Source journals select and print posted transaction details according to transaction source codes.
The GL Source Journal reports created using Source Journal Profile can be used for different purposes such as; Reports requested by Auditors, Tracking specific transactions for month end balancing, basic job cost reporting etc.
For Setting up a Source Journal Profile, follow below mentioned process:
1. Navigate to Sage 300 ERP >> General Ledger Module >> G/L Setup and select Source Journal Profiles.
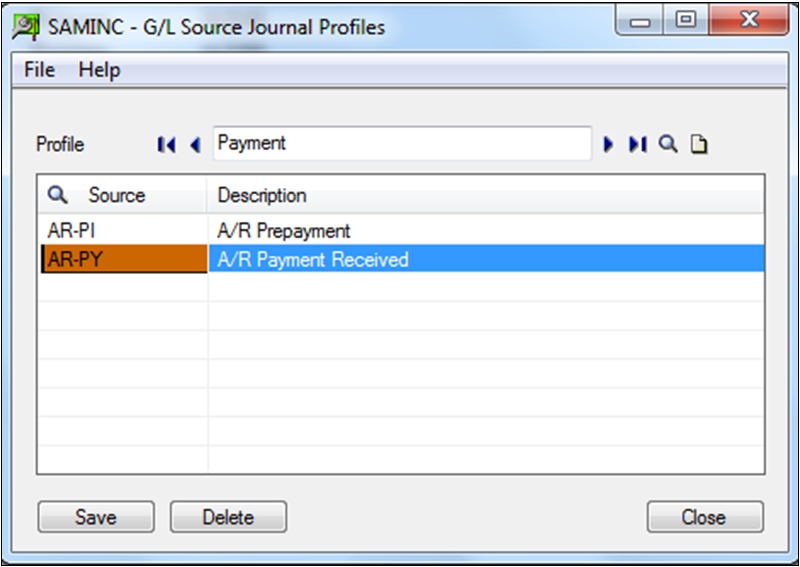
2. Enter a Journal Profile name (say Payment) and select the source codes to be included in the Source Journal Report.
Here, in the above example AR Prepayment implies advance received from customers and AR Payment received implies total cash in from customers. It would give us the total payments received from customers.
Similarly, one can create different profiles depending on their need; it can be Invoice Journals, Purchase and Receipt Journal, GL Journal and so on.
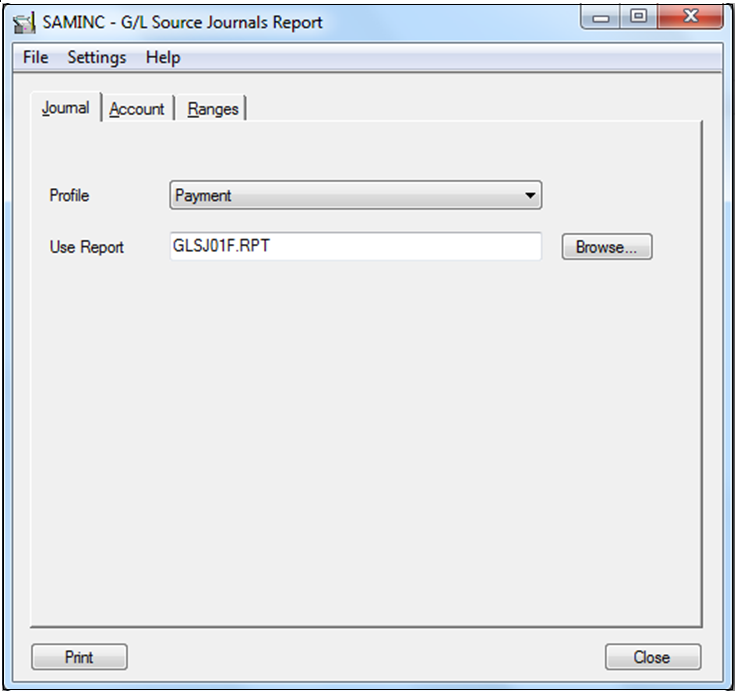
Printing Source Journal Report:
Source Journal lists the details of posted transactions from the source codes that are included in source-journal definition.
Users can also narrow report’s focus by specifying ranges of report fields. Specify the source codes that appear in a report in the source journal profile, and specify the following items when you print the source journal:
1. Reports can be Sort by account number, account segment, account group, or account sorted group.
a. Account Number – Chart of Accounts are defined in General Ledger, that identifies the account type as one of the income, expense, asset, and liability accounts that records companies business transactions.
b. Account Segment – General Ledger account number let’s user to define account numbers with two or more segments, one segment may be of account segment, and other segment may identify department. Every account number requires an account segment.
c. Account Group – Account Group is a broader classification to which each Account is assigned. Sage 300 ERP uses Account Groups to classify Account Balances whether it is an Income Statement or Balance Sheet Account.
d. Account Sorted Group – If you want to print a set of common account groups then give the same sort code to all account groups in set, specify printing by sort code order, and then choose the sort code of that set.
2. The ranges of account numbers, segment codes, account groups, or account sorted groups.
3. The ranges of fiscal periods (Month selection Range), references, dates (From and to dates selection), posting sequences, and batch numbers.
In other words, Journal profile specifies the type of transaction, but you refine the detail selection at print time. Thus, resulting in a flexible reports for tracing all kinds of transactions, originating from any of the sub-ledgers.
General Ledger comes with three source journal report definitions:
1. GLSJ01F.RPT — lists only the functional-currency value of transactions. This is a single-currency or functional-currency-only version of the source journal.
2. GLSJ01S.RPT — lists the source-currency and/or the functional-currency value of transactions. This is the full multicurrency version of the source journal.
3. GLSJ1SA.RPT — Use this report when you want to print source-currency reports on A4 paper.
